The Impact of Community Engagement — We Achieved a 27% Revenue Boost and 76% User Satisfaction
The online gaming community continues to grow exponentially. Millions flock to various platforms daily, eager to engage in their favorite dopamine-releasing pastime. Studies say around 41% of the global population has played or is playing a video game, showing the undeniable appeal of video games.
However, while there is a huge player base, individual gaming websites and platforms face tough competition from each other, especially post-pandemic. A simple Google search for ‘gaming websites’ or ‘play games online’ will give you millions of results.
Plus, the attention of online audiences is easily taken up by social media and OTT platforms, which offer users entertainment and foster a sense of community. So, it’s not easy for a gaming website or platform to stand out and be a person’s first choice.
However, our experience with building our World of Card Games brand has taught us many valuable lessons. The issues described can be fixed by paying attention to what gamers want, implementing those changes, and developing a community around the game.
So, let us take you through the challenges we faced and how we addressed those issues to build a successful gaming community.
Introduction: The Challenge of Standing Out

https://unsplash.com/photos/black-and-gray-game-controller-P8ERfhQ_mq4
In the 90s, having a few games on Nintendo 64 felt like unlimited entertainment and fun. The video game industry has come a long way since then. Today, gaming is not a rare pastime for a select few but a massive industry with a seriously dedicated clientele. Naturally, the competition is intensely fierce.
One could argue this is true for the arts and entertainment fields. But revenue generated globally by the gaming industry is more than the movies and music industries, combined. The gaming industry was $184.4 billion in 2022 versus $26.2 billion for music and $26 billion in box office revenue, respectively.
Thousands of gaming sites and platforms crop up yearly, and players are spoilt for choice. So, when we first launched World of Card Games, we were overwhelmed by the sheer number of similar, competing platforms out there.
Not only was the competition a challenge, but it was also difficult to keep players engaged. The feedback we received from players showed a need for the ‘feeling of community’. It was a major reason for low engagement.
Noting these as features we needed to improve, we set ambitious goals: to increase player numbers and foster a vibrant community centered around our game.
Here’s how we reactivated our inactive players and created a standout brand in the card game niche.
Listening to Our Players: The Foundation for Growth

https://unsplash.com/photos/black-and-white-printed-textile-vVSleEYPSGY
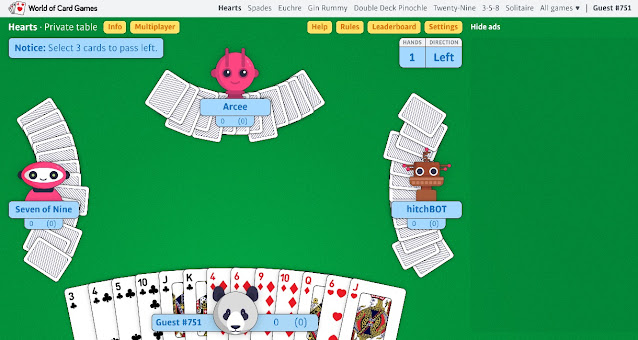
Our card game platform initially had a steady number of daily players, but over time, that number dwindled. We found a breakthrough in our challenges when we started listening to our players.
Here is how we built the foundation for our growth.
Implementing in-depth feedback collection
When player numbers started tapering off, we didn’t know the exact cause for a while. Our card gamers weren’t forthcoming with their problems. We had to actively gather feedback and insights from our players through our feature request and feedback board. We also followed up with players for reviews and ratings and reached out on social media.
Using feedback insights to shape our strategy
We received all kinds of feedback from our players. Some reviews were positive, and others were neutral. However, the most critical feedback we received was about the lack of a holistic gaming experience.
Many of our players said they ‘wish there was community support’. The resounding consensus was players wanted a better gameplay experience and interactive community features.
Bridging the gap between feedback and action
Once we realized the problem, we formulated solutions to improve gameplay and give our players the sense of community they craved. We transitioned from a mere game-only platform to a more rounded community-driven one.
Our platform evolved with each change and upgrade we made, leading to better engagement.
Here’s how we successfully implemented these innovations.
Implementing Community-Centric Innovations

World of Card Games has a clean, intuitive interface and quickly loads. The game ran smoothly from the get-go, but we needed to keep evolving.
One of the most satisfying things to a gamer is tracking progress and comparing it to others worldwide. Players tend to prefer gaming websites and platforms that have these capabilities.
So, after we collected insights on what our users wanted, we introduced these comparative and community features to our platform. We added new competitive modes and made social interaction possible. We also introduced custom challenges to enhance the community experience.
With targeted outreach, feedback collection, and engaging content, we could reactivate our inactive players, returning them to the fold. This also significantly rejuvenated the daily playtime per user.
Thanks to these initiatives, we saw a whopping 50% increase in new player sign-ups and a 40% reactivation rate of previously inactive players.
What did this mean, ultimately? Read on to see how our card game spread its wings.
The Ripple Effect: Word of Mouth and Brand Recognition

Transforming the World of Card Games into a community-forward platform was the best thing we could have done. Without any additional efforts toward marketing or advertising, we saw an increase in new players and returning existing ones.
We realized organically enhancing player satisfaction leads to word-of-mouth promotion. Our happy players were talking to their friends and family, recommending World of Card Games and its many attractive games.
Our referral program and community events were bringing in new players. We saw a 28% growth in referrals from existing users. What’s more, card game enthusiasts were generating a positive buzz by comparing their statistics and leaderboard records on online forums.
Our community-centric solutions and upgrades turned World of Card Games into a strong, recognizable brand within card-game communities and the online card game niche.
By enhancing the experience of our players, we could build a notable brand that keeps updating itself based on evolving needs.
Reflecting on Our Journey: Building More Than Just a Game
Staying rigid where customer experience is concerned can get you outmoded very quickly. Brands that don’t adapt to changing needs tend to fail. This is true in the realm of online card games, too.
When you figure out what is wrong or unsatisfactory about your game and fix it, you change and grow with your player base. Today, gamers want well-rounded gameplay and supporting community capabilities.
We offered our online gamers an experience that took them beyond the game. And we saw an increase in returning and new players. Cultivating a community around our game helped us elevate our brand and increase revenue, even though our platform is free-to-play.
Our journey with elevating the World of Card Games proves the benefits of listening to player feedback and harnessing the power of community engagement. With many free games and many community features, our players have as much fun playing on our platform as we do running it!